Comparing Creality’s Affordable Large 3D Printers
An overview of the CR-10, Ender 3 Max, and CR-10 V2
Creality took the 3D printing world by storm in 2016 with the disruptive CR-10: a 300 x 300 mm 3D printer priced at $500. It came at a time when anything larger than 200 x 200 mm was substantially over $1,000, far out of reach for most hobbyists. Since then, Creality has differentiated itself as the top manufacturer of low cost 3D printers with a large build volume, releasing many printers in this category. In this article, we’ll focus on the three most affordable 3D printers in the 300 x 300 size category. This comparison of the Ender 3 Max, CR-10, and CR-10 V2 takes a deep dive into these printers to help you make an informed purchasing decision. If you are looking for an affordable 3D printer capable of larger prints, these printers will be a great fit.
If price is less of a concern and you are looking for a more premium printer, take a look at the CR-10S Pro: it most notably features a unibody design, auto leveling, and an upgraded dual drive extruder in addition to the features of the CR-10 V2.
Note: Creality Experts receives a commission for items you purchase from this page, at no additional cost to you. For more information, please see our affiliate link policy.
Without further ado, lets take a look at the printers:
CR-10
Release date: 2016
Price: $275 - 325
The first of the CR-10 series lacks many features of newer printers, but is unmatched in affordability for its print size.
Ender 3 Max
Release Date: 2020
Price: $325 - 375
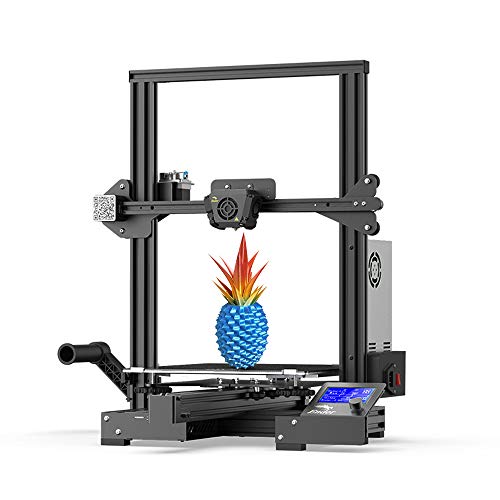
This supersized Ender 3 is large enough to compete with the CR-10 series, and maintains the convenient unibody style of the Ender line.
Shared Features
Before getting into the various differences, we’ll take a look at some of the features that are shared by all of these printers. Once you are acquainted with what all of these printers can do, we’ll outline the upgrades and whether we think they are worth the extra cost
Build Volume
All of these printers have a bed size of 300 x 300mm, but they differ in maximum print height. The CR-10 series has a max height of 400mm while the Ender 3 Max tops out at 350mm. This is substantially larger than the standard 200mm cube of many 3D printers on the market, and enables you to print much larger objects. It does have the tradeoff of a larger footprint, making any of these printers more difficult to fit on a standard desk. If you are looking for a smaller printer or have limited space, we recommend looking at our Ender 3 Comparison Guide to see some smaller Creality printers. If you aren’t sure, we’ll provide the dimensions of all the printers later so you can see for sure what will fit in your space.
Simple Assembly
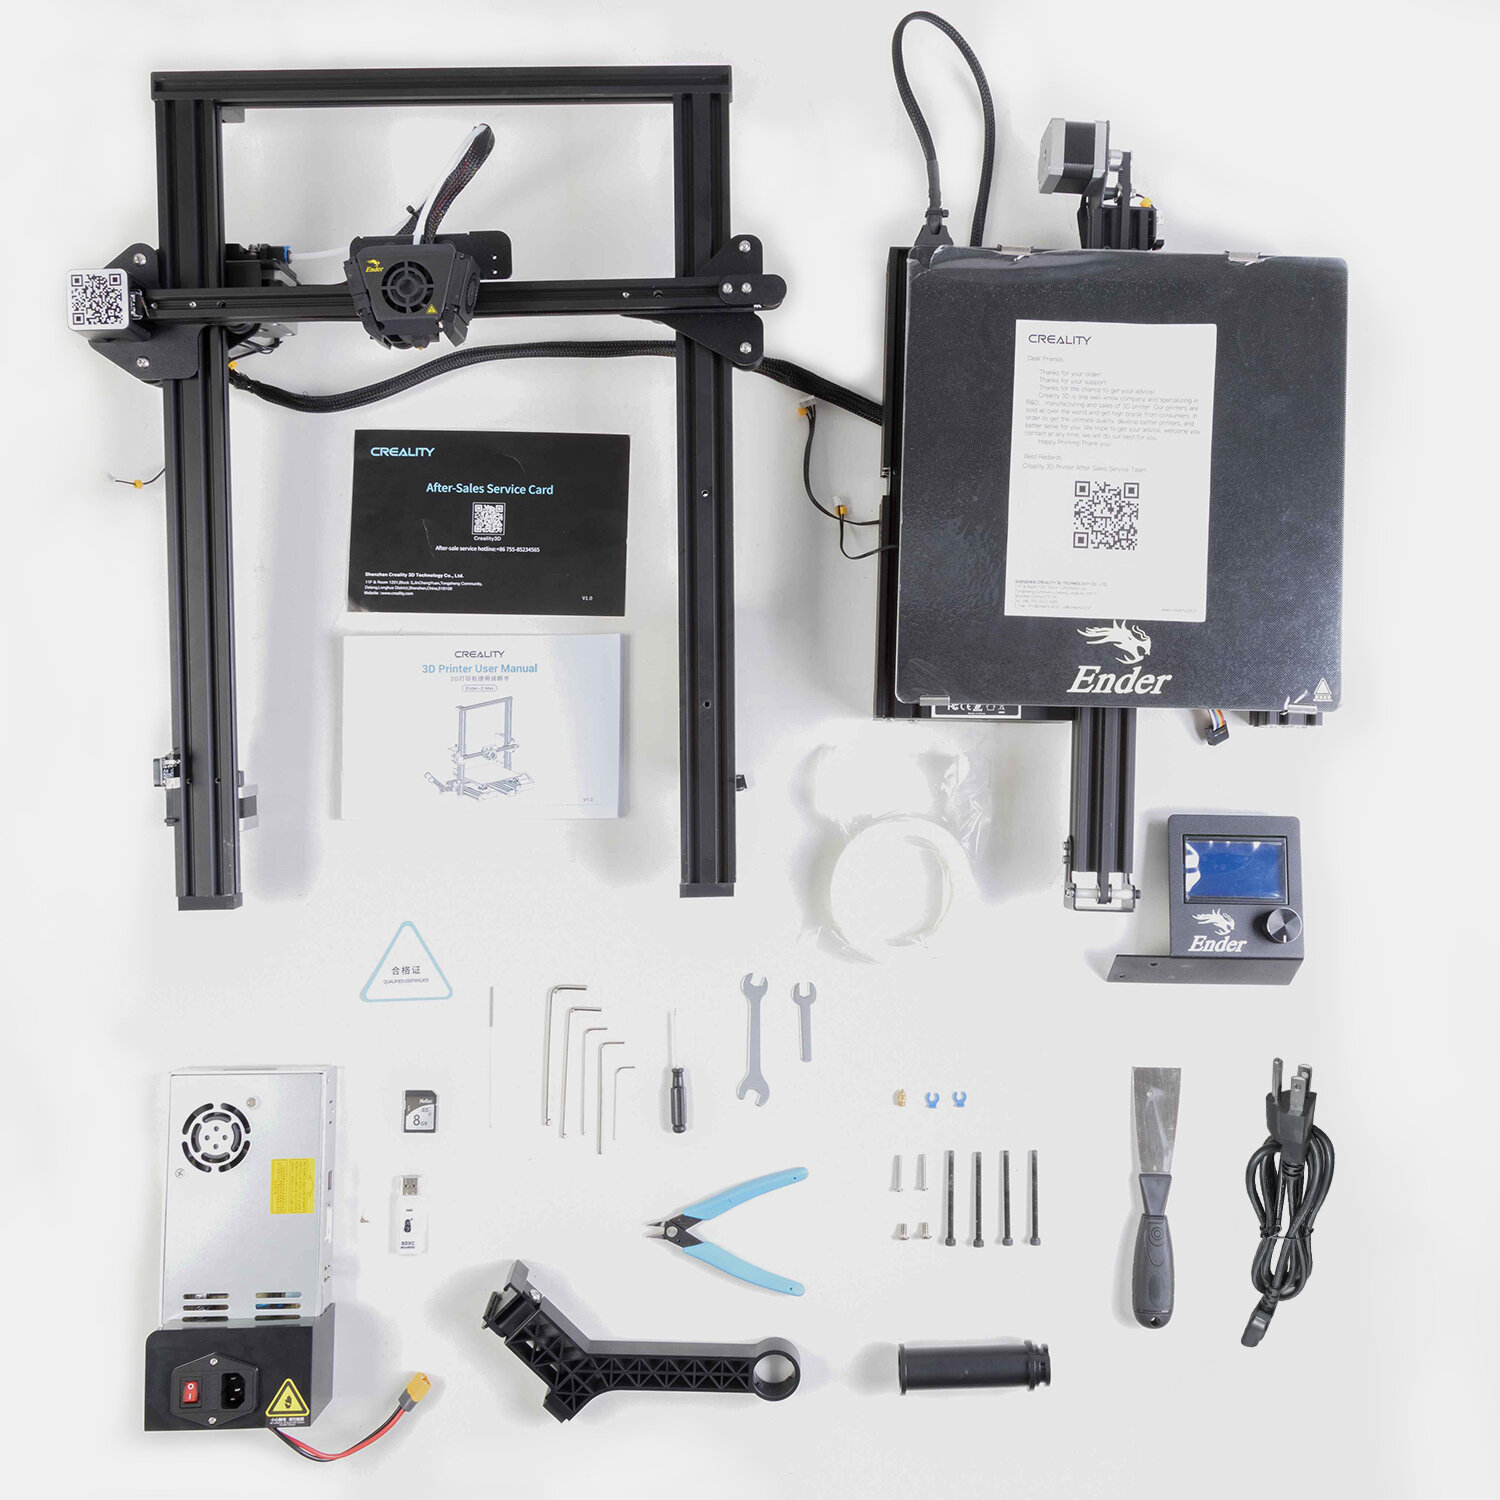
All three printers are fairly easy to assemble, with the entire top assembly shipped as a single piece (Ender 3 Max is pictured here)
All three of these printers are among the simplest Creality printers to assemble. While they do ship in a few pieces to reduce the size of the box, assembly only requires mounting the Z-frame to the base, and connecting a few cables that clip together. They are much simpler than the smaller Ender 3 series printers, which come in 12-15 pieces and take about an hour to assemble.
Take a look at our CR-10 Assembly Guide for a more detailed look at the process of assembling these 3D Printers.
Material Capabilities
All Ender 3 models include the same extruder and similar hot end. While the hot end enclosures look different on each printer, the underlying hardware is largely the same. The CR-10 V2 does have a redesigned heat sink, but this does not have a significant effect on hot end performance. The hot end is capable of getting up to 260C, hot enough to print any common materials like PLA, PETG, and ABS. The hot end assembly includes a part fan which cools parts as they print, and is especially useful when printing in PLA. The part cooling fan configuration is an important difference between the machines which we will discuss more later.
The printers all use a single gear drive extruder, however the base CR-10 uses a plastic version. We suggest upgrading to a metal extruder for improved reliability.
All three printers include a heated bed capable of reaching 100C, which is hot enough to print ABS parts. However, the 12V power supply on the base CR-10 means that the bed will take longer to reach these temperatures—typically about 7-8 minutes.
Bed Leveling
None of these printers include auto bed leveling, meaning you’ll need to use the four knobs on the bed to ensure the bed is precisely leveled. We have found that these printers do a good job maintaining their leveling settings and don’t require much attention once you have dialed in the leveling the first time. The printers do each differ in their support for auto-leveling upgrades, which we’ll cover later in this article.
Physical Size and Footprint
The Ender 3 Max has a significantly smaller footprint, mostly due to its integrated display and control board. Both CR-10 series machines have a separate controller box which requires additional clearance and also makes the printers harder to transport. The chassis of the CR-10 V2 is very similar to the base CR-10, and is almost exactly the same size.
CR-10 / CR-10 V2: 600 x 585 x 620 mm (23.6” x 23” x 24.4”). (The frame alone is 465mm wide, but you’ll need an additional 125mm of clearance on the left side for the controller)
Ender 3 Max: 513 x 563 x 590 mm (20.2” x 22.2” x 23.2”) (You’ll need about 200mm of clearance on the left side with the stock filament holder, but you can easily install a top mounted spool holder if space is an issue)
For comparison, the smaller Creality Ender 3 V2 (with a 220 x 220 x 250 build volume) has a footprint of 440 x 410 x 465 mm. If you have the space for it, we recommend going with a larger printer; we found that the 220mm limitation is often an issue with projects, and the larger capability comes in handy quite often. The 300 x 300 size is a sweet spot between the limiting 220 mm and the unwieldy beds of even larger printers.
With its substantially smaller footprint, the Ender 3 Max is the clear winner if space is a concern.
Print Quality
While the base CR-10 is capable of high quality prints, the Ender 3 Max and CR-10 V2 include some important features that will improve the print quality even further.
Part Cooling
The base CR-10 does include a part cooling fan, but it is not as powerful as the other printers and only blows air on one side of the nozzle. The CR-10 V2 and Ender 3 Max both include improved part cooling systems that cool all sides of the print:
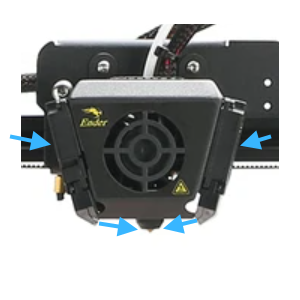
The Ender 3 Max has two separate fans on each side of the hot end which cool the part
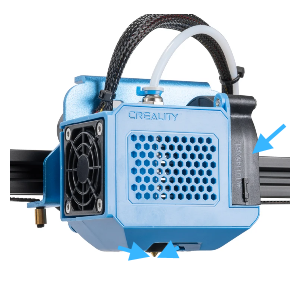
The CR-10 V2 uses a single larger blower-style fan, and the hot end enclosure ducts the air to both sides of the print
While these implementations are different, both have similar results to ensure consistent cooling. You will notice this especially when printing parts with severe overhangs. Based on printing a variety of parts with both of these printers, we think this is a substantial improvement over the base CR-10 and makes the V2 and Ender 3 Max printers much more versatile with what can be printed without the need for support material.
The base CR-10 fan routes air to only one side of the nozzle, causing inconsistent overhang results depending on the print orientation
The Ender 3 Max has a dedicated fan for each side of the nozzle. This is our preferred configuration since the air is routed directly to the nozzle.
The CR-10 V2 uses a single larger fan, and the enclosure contains ducting to route the air to both sides of the hot end. The righthand fan is routed to the hot end and is not used for part cooling.
Stability
The CR-10 V2 includes a few stability improvements that can ensure a smoother finish on your prints at higher speeds. The first is that the CR-10 V2 is equipped with two independent Z lead screws on each side of the printer. This feature ensures that the extruder crossbar is more stable and less prone to wobbling. In practice, we have found that this additional Z lead screw does not have a significant effect on print quality. Further, it is possible for the two rods to become out of sync, causing the crossbeam to become skewed and not level with the bed, causing issues with leveling and prints that are not square. That said, if you are interested in adding a direct drive extruder to print flexible materials, this additional lead screw is a must-have since the carriage will weigh significantly more with the direct drive extruder and will require the additional support.
The second upgrade is the two stabilizing rods that are included with the CR-10 V2, which act to keep the printer more stable for taller prints. We have noticed some improvement from these bars on very tall prints above the 300mm mark, since the effect of any wobble increases as the print gets taller. However, for most prints we did not notice a difference in quality as long as the assembly bolts holding the vertical frame are tightened sufficiently.
The CR-10 V2 includes a lead screw and motor on both sides of the printer, but we do not notice significant improvements in quality from this update.
the CR-10 V2 also features stabilizing bars. These improve the stability of the printer for especially tall prints, but otherwise do not substantially impact quality
The Ender 3 Max and the CR-10 V2 are tied in this category, primarily due to the part cooling fan improvements over the base CR-10.
Reliability
All three of these printers are very reliable, including the base model CR-10. We can personally attest to this because we have multiple CR-10s purchased in 2016 that are still working and printing customer orders for our 3D printing business. We have had to replace a few parts on these printers after such extended use, including multiple new hot ends, an upgraded metal extruder, and new power supplies. Fortunately, replacing the hot ends on the CR-10 series is very easy; you can even buy a fully assembled hot end replacement which can be installed with only four screws and no wire splicing. While the CR-10 V2 and Ender 3 Max have similar hot end kits, they both do require splicing the wires, which makes the installation a bit more difficult.
With that said, the Ender 3 Max and the CR-10 V2 both add some improvements that will make them more reliable, and prevent some of the repairs that were eventually needed on the CR-10.
A premium metal extruder is included on the Ender 3 Max and the CR-10 V2. This upgrade can be installed onto the base CR-10 as well.
The Ender 3 Max and the CR-10 V2 also include upgraded metal extruders, while the CR-10 uses a plastic extruder housing. You can upgrade the plastic extruder to a metal one pretty easily, though. We have done so on all of our CR-10s.
Both the Ender 3 Max and the CR-10 V2 include a premium Meanwell power supply, which is what we used when replacing the PSU in our base CR-10s. We can confirm that these power supplies are more reliable, and we haven’t had one fail yet on any of our printers. While you can apply this upgrade the the base CR-10, it does require opening the control box and securing wires to screw terminals. While no soldering is required, we still don’t recommend it for beginners.
All three printers include Thermal Runaway Protection, an important safety feature that allows the printer to detect when there is a malfunction on the temperature sensor and shut off the power to the heater cartridge. Without this protection, if the temperature sensor malfunctions while the printer is active, the heat cartridge will continue to try to heat, potentially reaching very high temperatures. It is important to note that CR-10 printers did not always have this feature, so be sure to check that any CR-10 you buy has the newer upgraded firmware listed in the product description, such as the one we have linked. We strongly recommend avoiding any printer that does not have this protection.
Usability & Convenience
The Ender 3 Max and CR-10 V2 include a filament runout sensor, which pauses the print to allow you to load more filament
This area is where the biggest differences arise between the older base CR-10 and the newer Ender 3 Max and CR-10 V2. These printers include many convenient features that are becoming more common on modern printers. These features include:
Filament Runout Sensor - If your printer runs out of filament, the printer will pause and beep to let you know, allowing you to reload it and start again. We noticed that annoyingly, the bed heater is also turned off when this happens, so if you are not able to restart the print within 3-4 minutes, the part will often detach from the bed. This ruins the print.
Updated Mainboard with Silent Stepper Drivers - Older printers such as the CR-10 produce a song-like sound when printing due to the frequencies of the motors moving. Newer electronics prevent this issue, making the printer substantially quieter, since the only sound you will hear are the fans.
24V base power - This drastically decreases the heating time for the hot end and bed. This is especially noticeable if you print materials like PETG and ABS which require hotter bed temperatures. The base CR-10 takes approximately 5-7 minutes to reach 100C, while the Ender 3 Max and CR-10 V2 only take 2-4 minutes to reach the same temperature.
One convenience that is missing from all of these printers is auto bed leveling, which comes standard on more premium printers such as the CR-10S Pro. However, the CR-10 V2 makes it easier than most to add this upgrade if you’d like to; the extruder carriage has screw holes ready for the sensor, and the sensor can be plugged into the printer with minimal disassembly. The upgrade is a bit harder on the Ender 3 Max, but is still possible. The base CR-10 is completely incompatible with this upgrade.
In terms of ease of use, the CR-10 V2 and Ender 3 Max are tied, but both are far ahead of the CR-10.
The Verdict
Before we make our recommendations, take a moment to review the differences for yourself in the table below:
Overall, we recommend the Creality Ender 3 Max (Check Price) as our top choice for a 3D printer that is both large and affordable. It offers almost all of the improvements of the CR-10 V2 but at a substantially lower price. In addition, it features an integrated control board and screen, which improves the footprint and portability versus the CR-10 series. While the CR-10 V2 does make it easier to add auto leveling, we feel that at that point it makes more sense to jump to the CR-10S Pro V2 (Check Price). The CR-10S Pro V2 includes auto-leveling already installed in addition to some other nice upgrades such as a dual drive extruder and a unibody form factor, and typically costs about $100 more than the CR-10 V2.
If budget is the biggest factor, the base Creality CR-10 (Check Price) is a good option if you are willing to sacrifice some of the newer conveniences for a low cost printer. The fact that a 5 year old printer is still competing with newer models is a testament to its quality, despite it showing its age in terms of its features.
We hope you found this comparison of the three printers useful. If you’re interested in seeing more of Creality’s 3D printer options, make sure to check out our printer comparison overview.


