Sprite Extruder Upgrade Buying Guide
In this article, we’ll compare two different upgrade kits you can use to upgrade your Creality printer with a direct drive extruder. These extruder kits can both be installed on many Creality printers, including the Ender 3 series, CR series, and Ender 5 series. We’ll provide more details on compatibility later in the article to help you pick the correct kit for your 3D printer.
Both of these upgrade options are referred to as Creality Sprite extruder upgrade kits, but one (the Sprite Extruder Pro upgrade) includes a full extruder and all-metal hot end assembly, while the other includes only the extruder, and integrates with the 3D printer’s existing hot end. To prevent confusion, we’ll refer to the second kit as the Extruder-Only Sprite upgrade. These two upgrade kits come in at different price levels since the Pro kit includes the hot end and the extruder-only kit does not. We’ll cover all of the trade-offs to help you determine which of these is a better upgrade for your printer.
Note: Creality Experts receives a commission for items you purchase from this page, at no additional cost to you. For more information, please see our affiliate link policy.
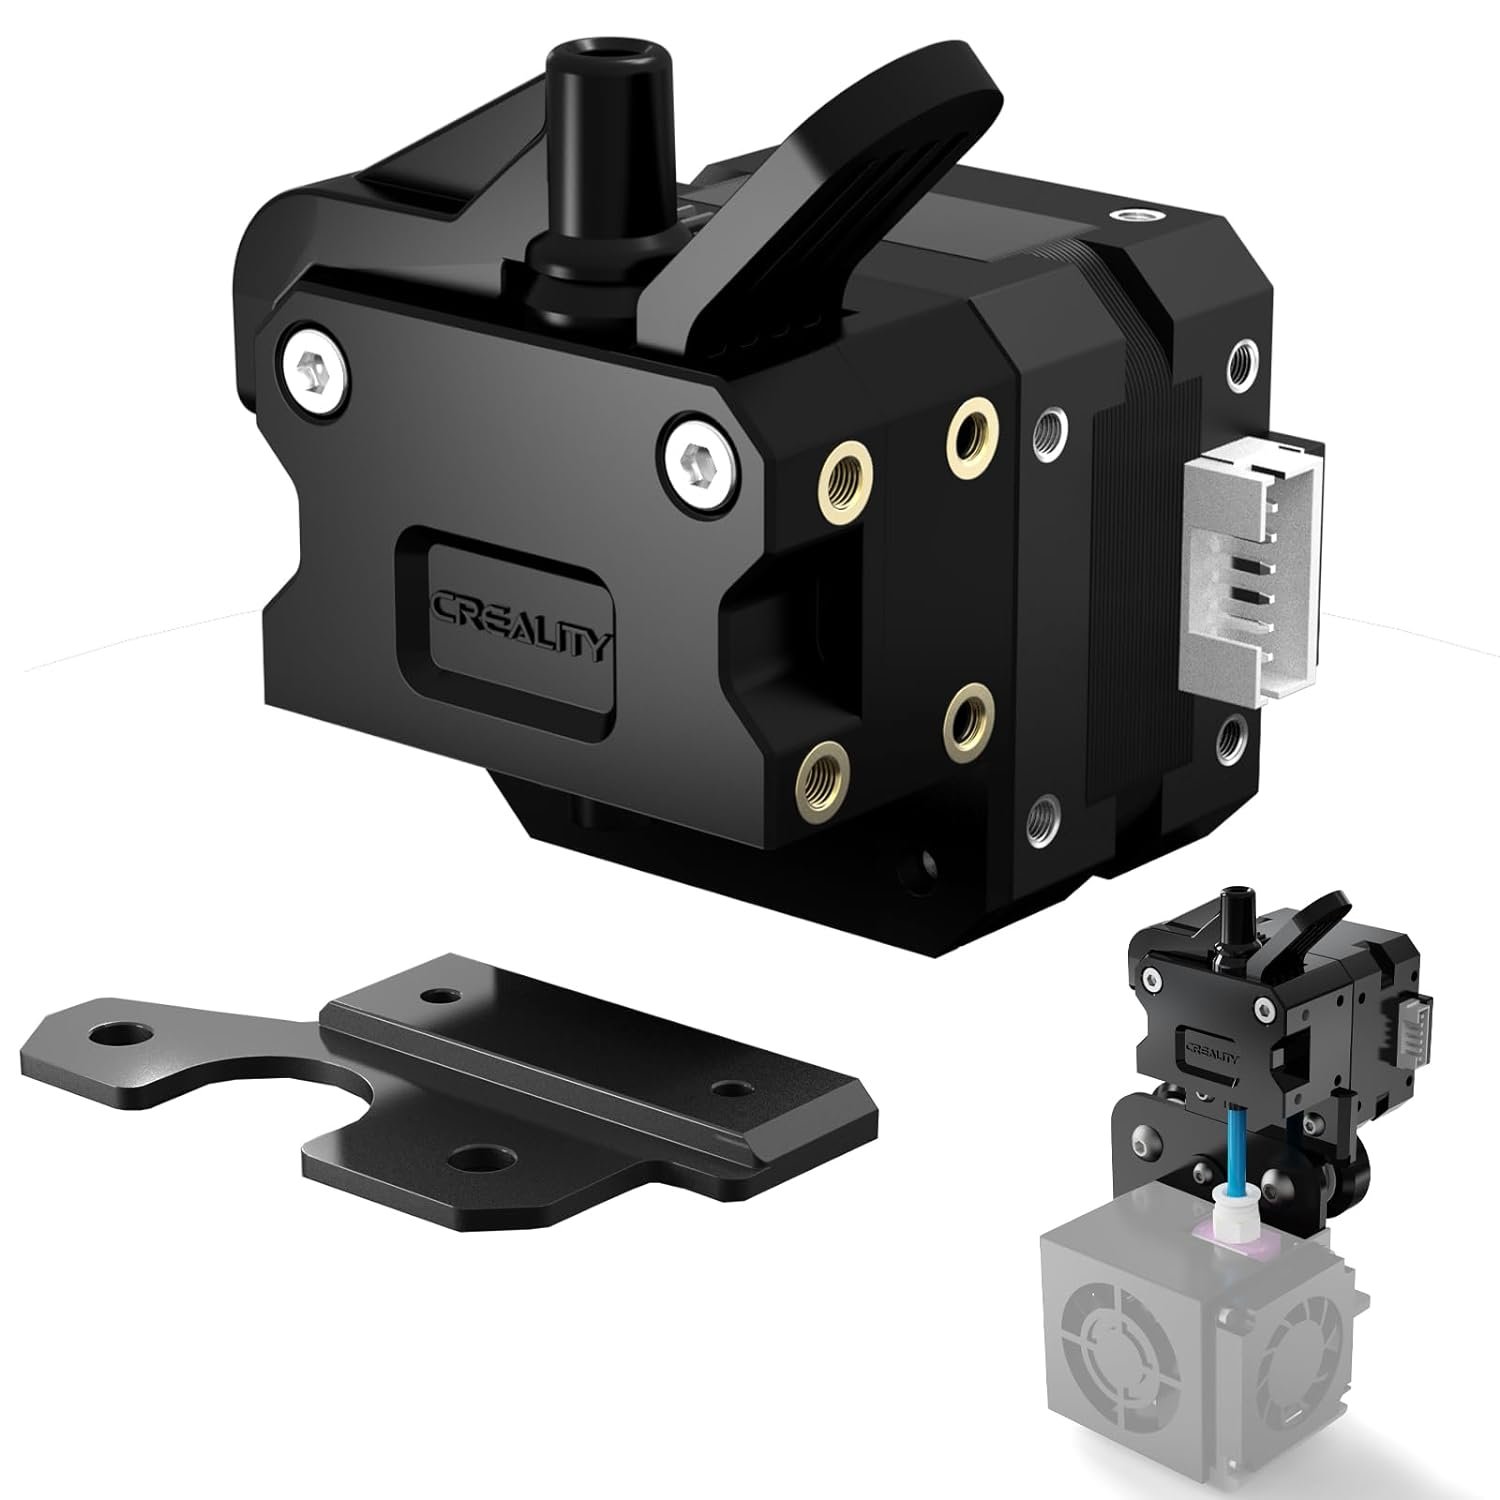
The Sprite Extruder-Only Upgrade includes the direct drive extruder only, and integrates with the existing hot end of your Creality 3D printer.
Vs.
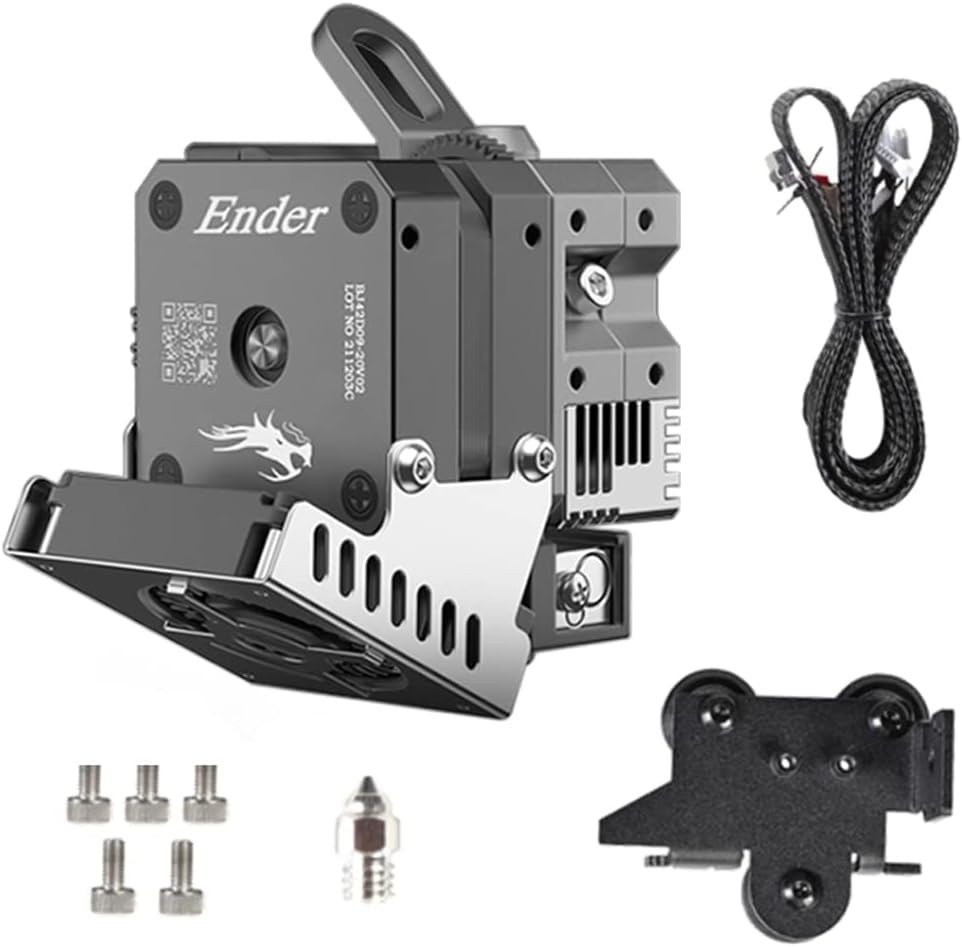
The full Sprite Extruder Pro Upgrade includes the direct drive extruder and all-metal hot end in an integrated assembly.
If you already have the kits or are looking specifically for installation instructions, refer to our guides:
Sprite Extruder Pro Upgrade Guide
Sprite Extruder-Only Upgrade Guide
Why Upgrade To Direct Drive?
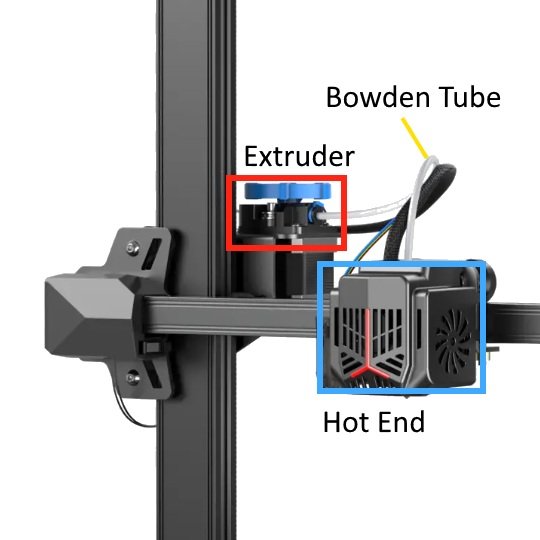
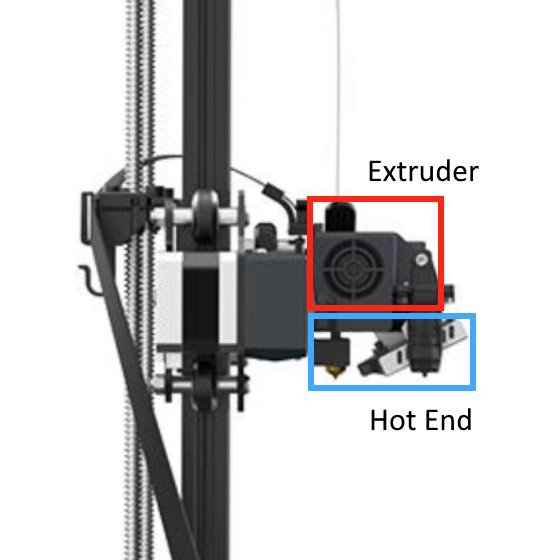
The Sprite extruder [Amazon link] was first introduced on the Ender 3 S1 and is Creality’s first direct drive extruder. In contrast to the Bowden-style extruder which pushes filament through a long tube to the hot end, the Sprite combines the extruder and hot end into a single assembly.
Direct drive extruders have a number of benefits over Bowden extruders:
Improved printing of parts with many small features
Better support for flexible materials like TPU
Less stringing
Less susceptible to jamming
Bowden extruders do offer the advantage of a lighter hot end, however we have not encountered any issues due to the increased weight from the direct drive extruder, such as waviness in prints or limited print speed.
In our experience printing many parts with each extruder type, the Sprite extruder is noticeably more reliable than our other Creality extruders, making it a worthwhile upgrade for any Creality printer that doesn’t come with it.
Many Creality 3D printers use a Bowden-style extruder, with a tube between the extruder and hot end.
The Sprite extruder is direct drive, where both the extruder and hot end are combined into a single assembly.
Which Direct Drive Extruder Kit Should You Choose?
Advantages of the Sprite Extruder Pro Upgrade
The Sprite Extruder Pro Upgrade kit (Amazon link) includes the Sprite direct drive extruder and an all-metal hot end in a single integrated assembly.
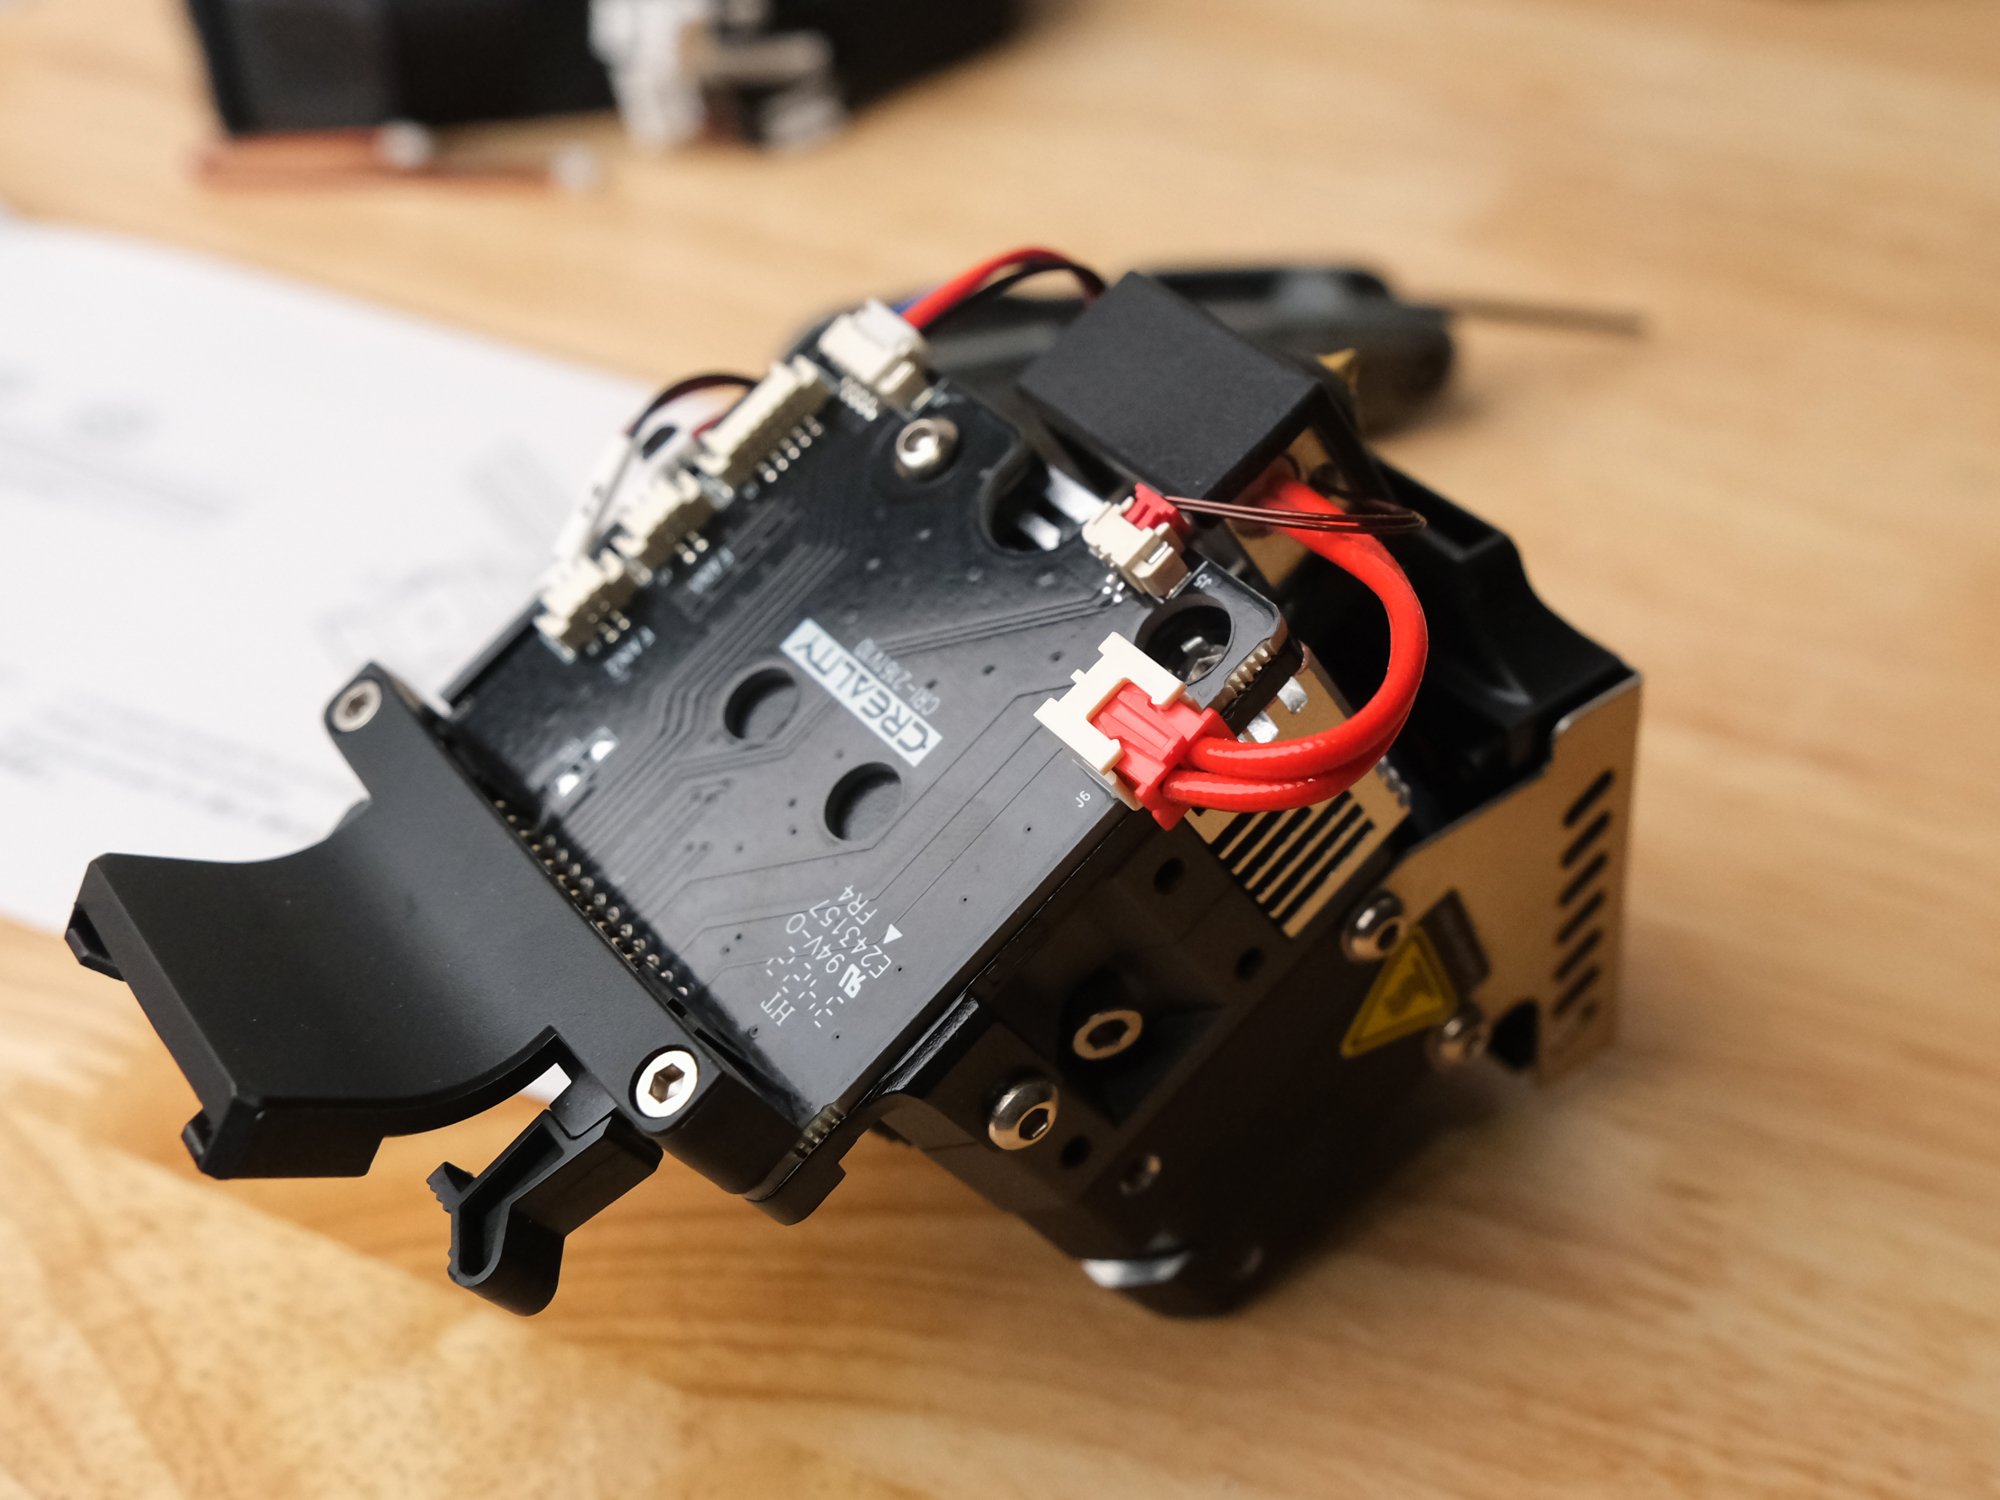
This kit has a generally superior design over the alternatives. It features improved cable management, using a single ribbon cable to connect the extruder instead of the many bundled wires of typical hot ends. Overall, it looks more polished than the extruder-only kit, which is less compact and looks somewhat cobbled on. The extruder also includes a breakout board on the extruder assembly itself with connectors for all of the hot end electronics, making it easy to replace the heater cartridge or thermistor if they ever need to be replaced.
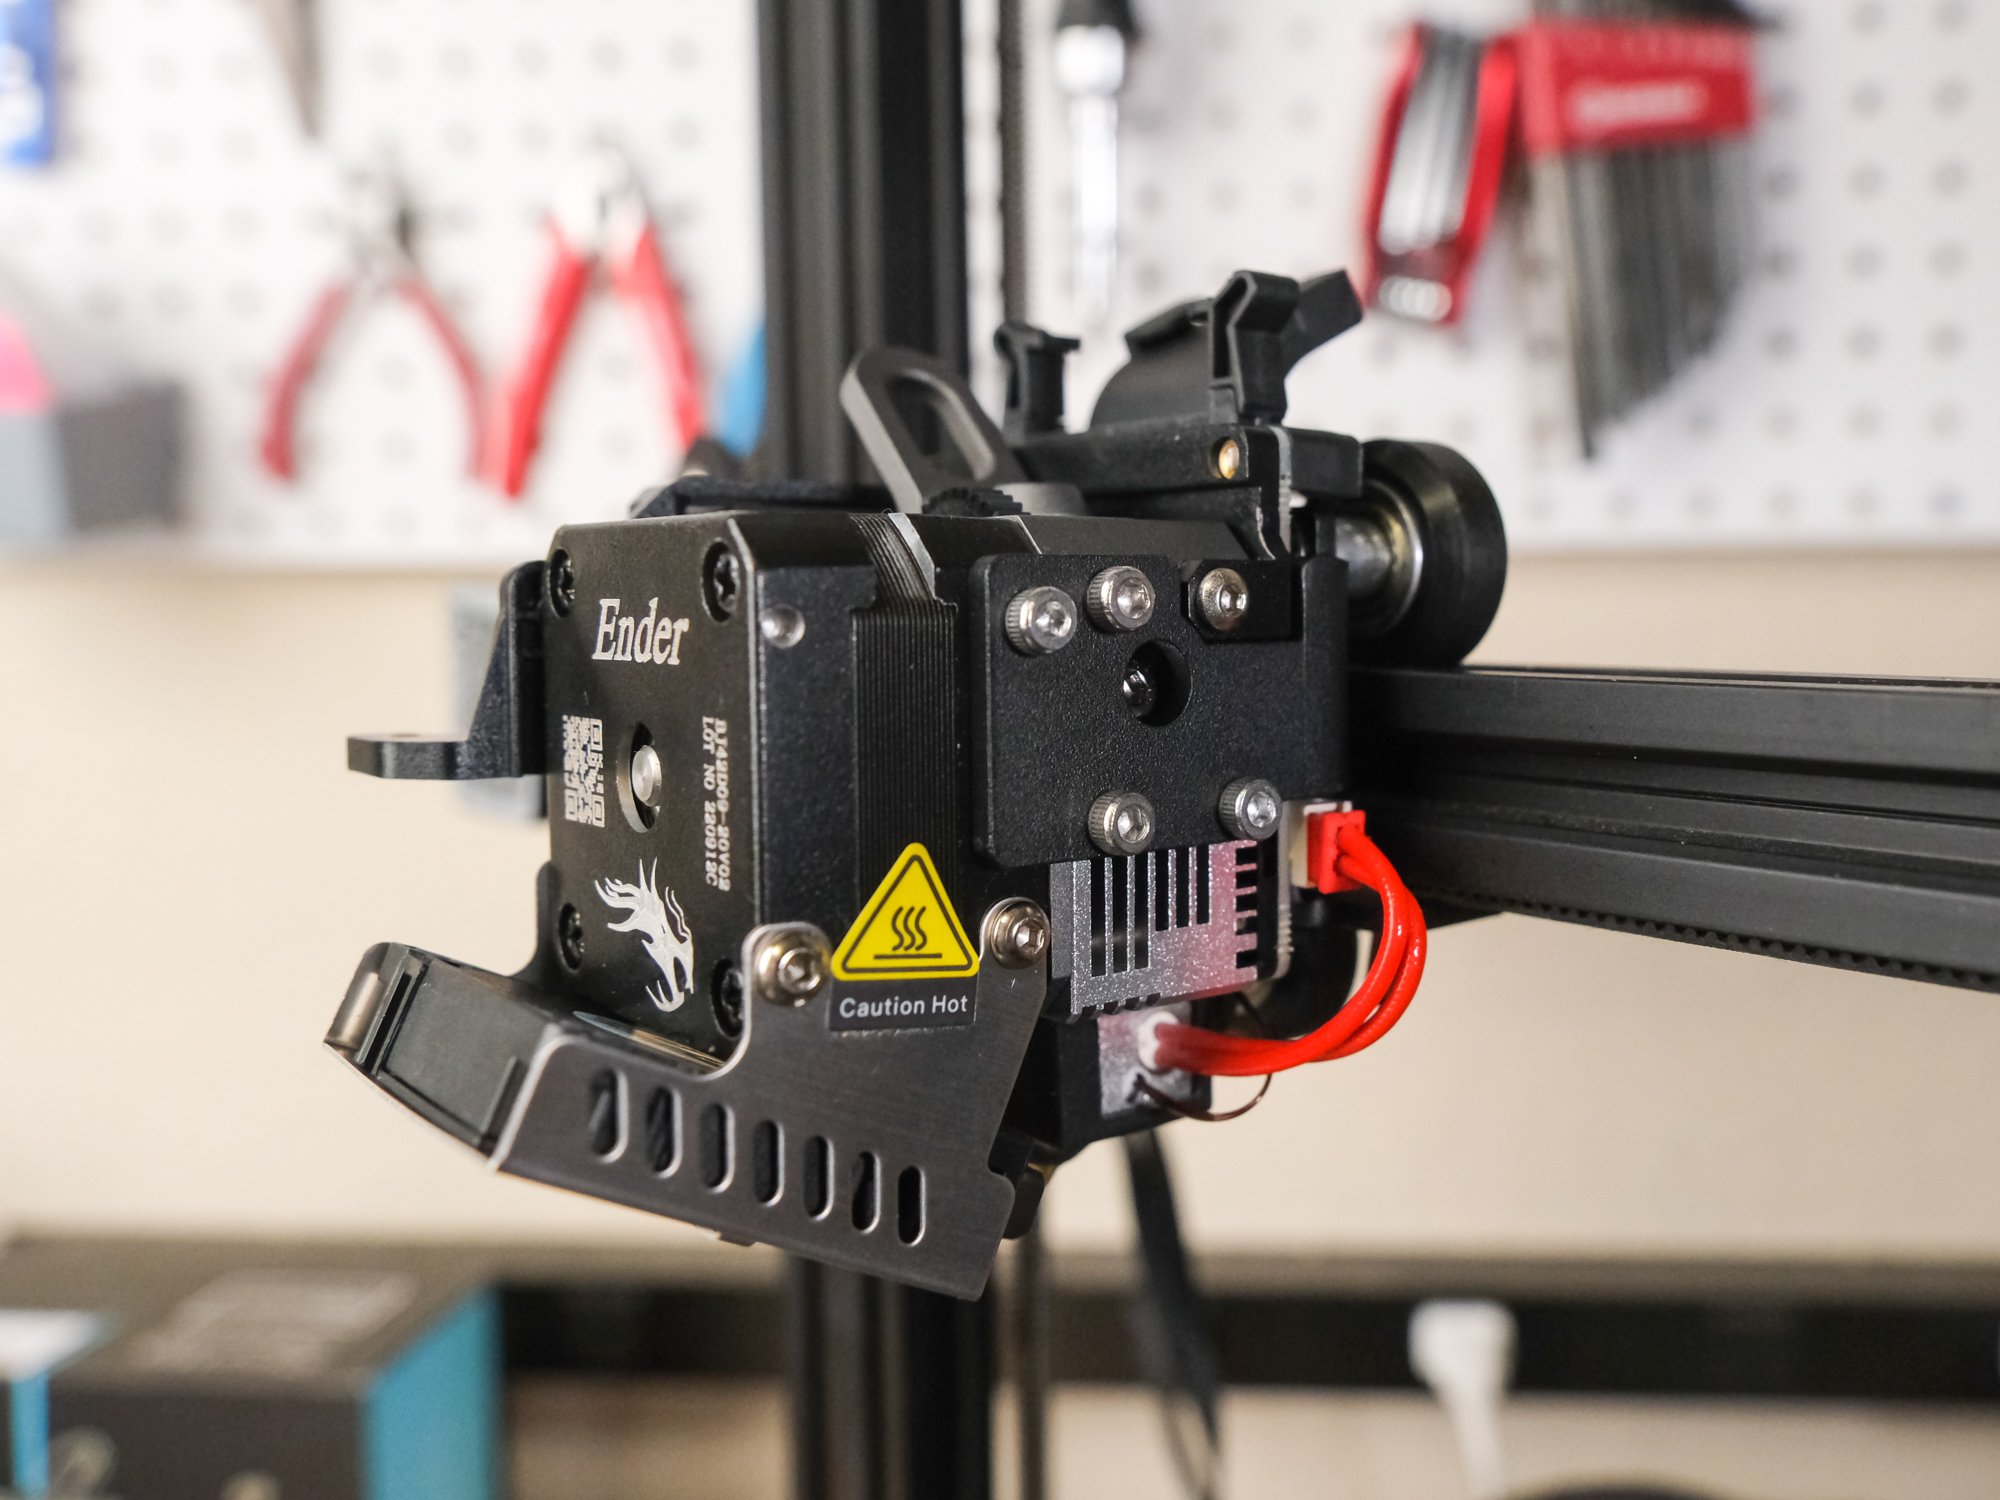
The full Sprite Extruder Pro kit is a compact single unit.
The Sprite Pro uses a clean ribbon cable for all connections.
A breakout board on the extruder makes it easier to repair the heater cartridge or thermistor if needed.
Another advantage of the Sprite Pro kit is that the extruder is located closer to the hot end. The primary reason direct drive extruders have an advantage over Bowden extruders is that the filament path is much shorter between the extruder and the hot end, so the benefits are more pronounced as the filament path is shortened. The filament path is about 3” with the extruder-only kit, compared to a bit under 2” on the Sprite Pro kit. However, both of these are far better than the 15”+ length of a Bowden tube in a Bowden extruder setup.
Additionally, the full upgrade kit includes an all-metal hot end, which allows you to print high-temperature materials such as nylon. However, it is also possible to upgrade your hot end separately with the bimetallic heat break upgrade, which will still have a lower total cost than the Sprite Pro upgrade.
Finally, on some printer models, the Sprite Extruder Pro upgrade may improve the printer’s part cooling capability. Since the Pro kit includes the entire extruder and hot end assembly, it replaces the existing part cooling fan on the printer. We’re generally pleased with the part cooling fan on the Sprite Pro kit and have found it to perform well, although it’s a single-fan design and is not the more comprehensive part cooling system we’ve used. On the other hand, some of Creality’s printers (such as the Ender 3 V2) have particularly ineffective part cooling and will benefit from this upgrade.
Advantages of the Extruder-Only kit
The Sprite Extruder-Only kit (Amazon link) has a much simpler install process because unlike the Pro kit, you do not have to replace all of the hot end wiring and connect the wiring harness to the mainboard inside the printer. Instead, the extruder-only kit keeps all of the existing hot end wiring in place, and only requires you to disconnect the extruder motor cable and reconnect it to the new extruder.
The mechanical aspects of the installation are also less complex than the Pro kit, because you do not have to replace the extruder carriage. While we think the Sprite Pro Extruder upgrade process should be manageable for almost all users, there is no doubt that the extruder-only kit is simpler to install.
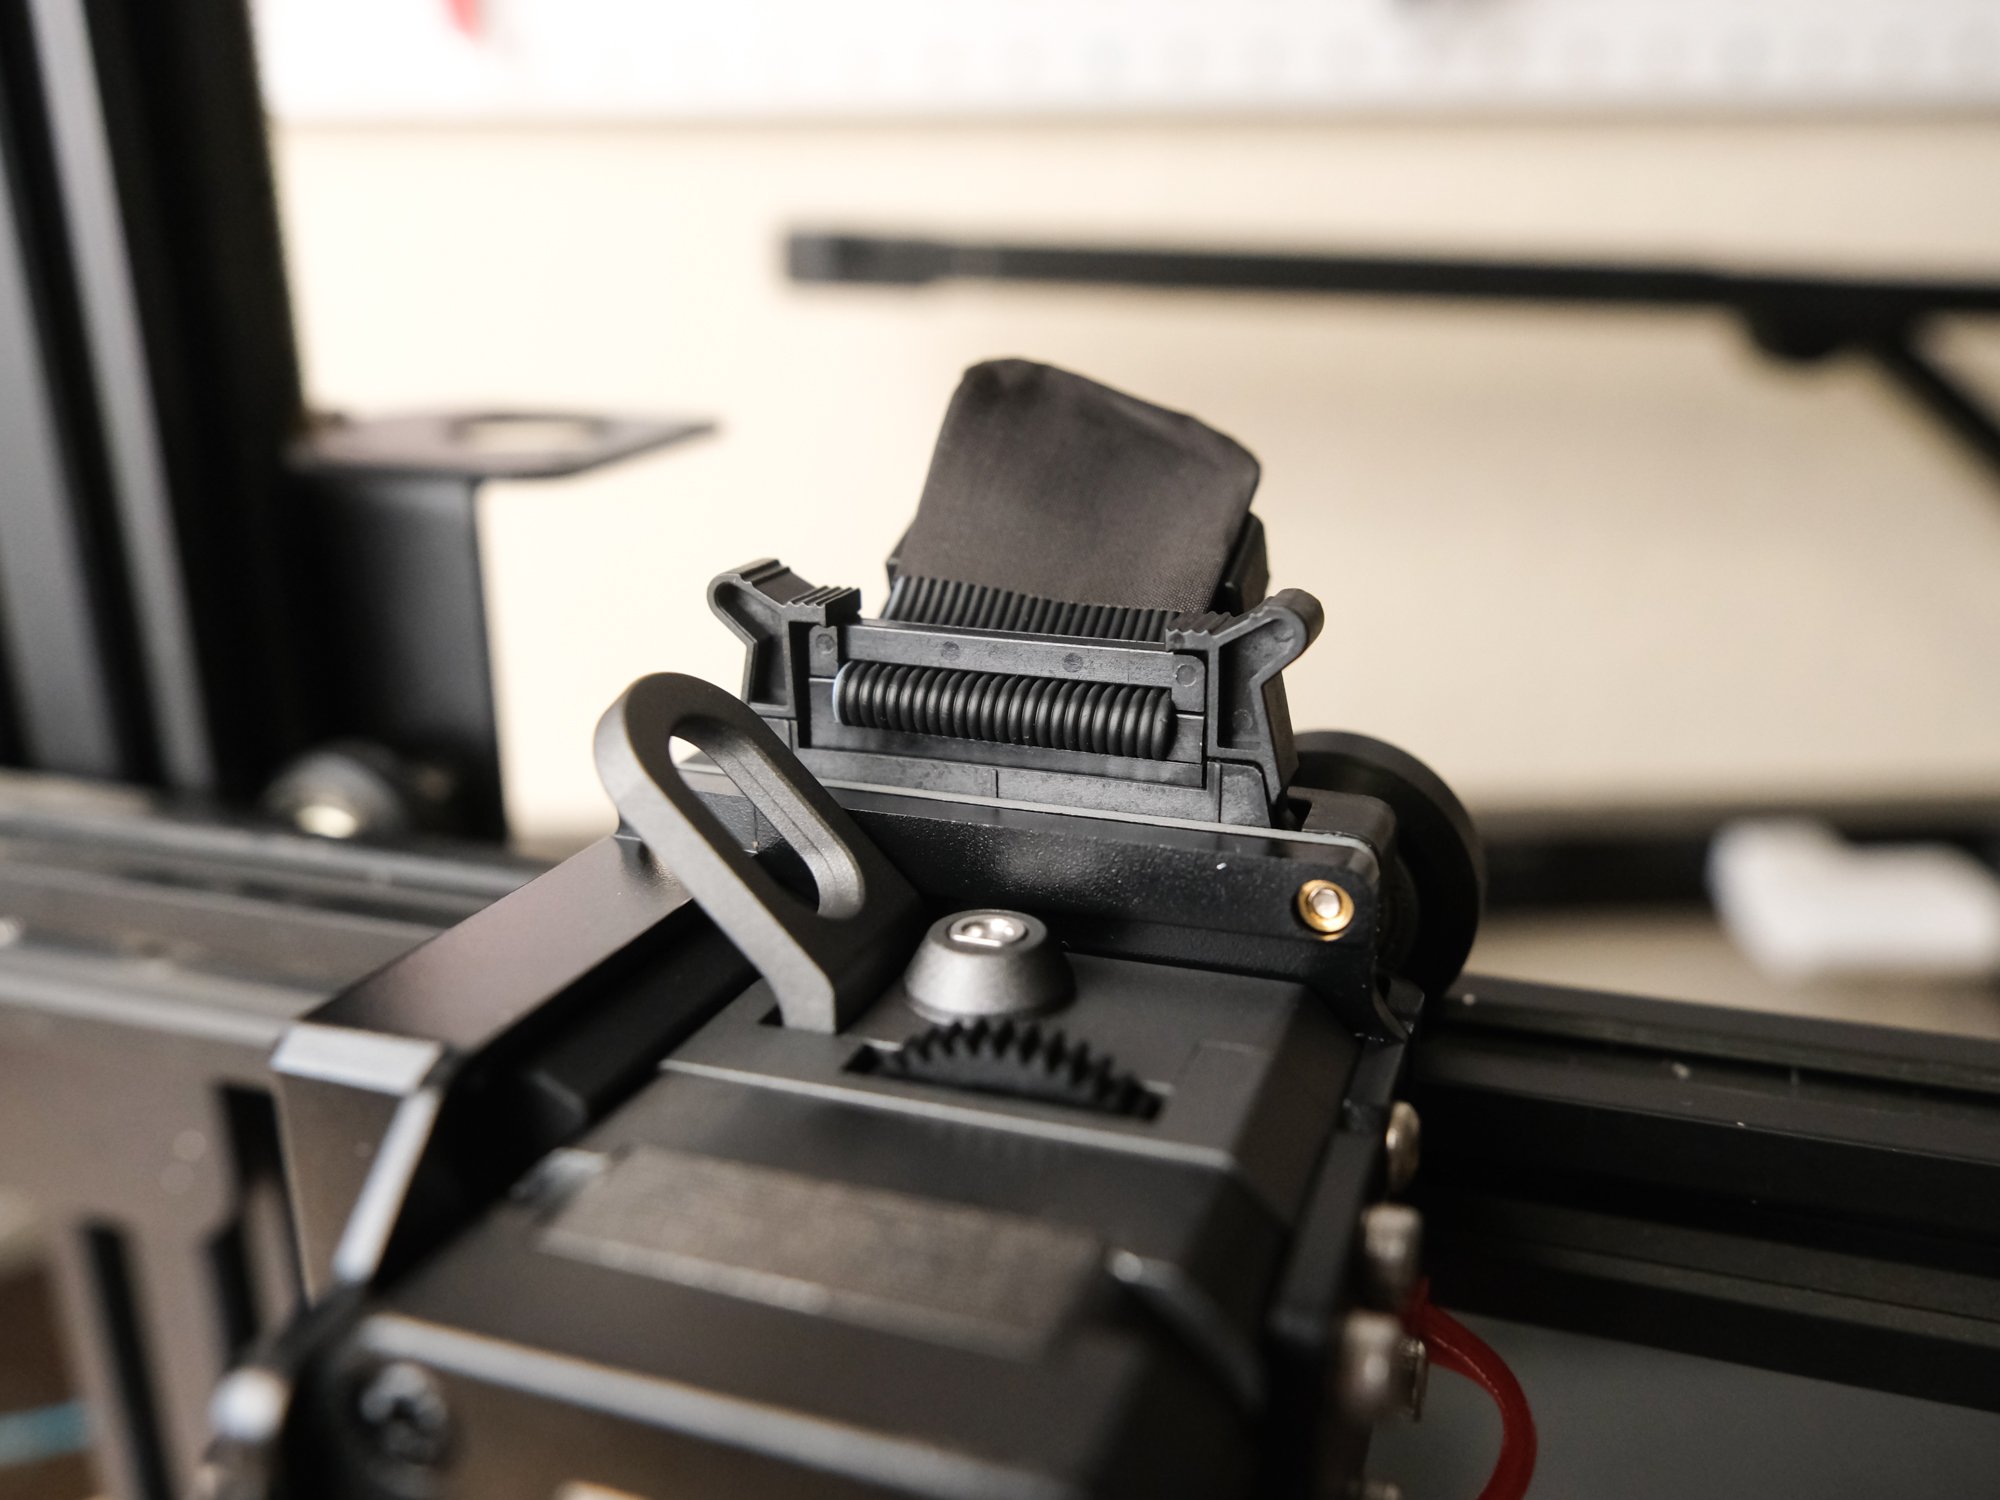
The Sprite Extruder-Only kit integrates with the existing hot end, but looks less polished than the Pro kit.
You only have to change one cable connection—the extruder motor cable.
The longer Bowden tube shows the increased distance between the extruder and hot end, compared to the Sprite Pro Extruder upgrade.
Additionally, the Sprite extruder-only kit is significantly less expensive than the Sprite Pro extruder kit, which we think is its most compelling advantage. The Pro kit is priced around $90-100, while the extruder-only kit is often priced at $30-40. This is an appealing cost savings, especially on a lower-cost machine such as the Ender 3.
Performance Comparison
In terms of performance, we have found that both upgrade kits perform comparatively, and both are significantly better than the Bowden extruders found on many Creality 3D printers. However, we did see a bit more stringing with the extruder-only kit, and had to use a slightly higher retraction distance with that extruder, which can make it perform slightly worse than the Sprite Pro kit. We expect this is due to the increased distance between the extruder and hot end.
The other key performance difference between the kits is in material compatibility. Only the Sprite Pro kit is able to print high-temperature materials such as nylon. To print materials above 260° C with the extruder-only kit, you would need to use it with an all-metal hot end.
Our Recommendation
Overall, we think that if price is a big factor in your upgrade decision, the Sprite Extruder-Only upgrade (Amazon link) is a better value and offers nearly all of the benefits that the Pro kit provides. On the other hand, if you are not as worried about cost and want the best performance and a polished appearance, the full Sprite Pro Extruder upgrade kit (Amazon link) is the right choice.
Creality 3D Printer Compatibility
Before deciding, make sure that your Creality printer model can support the upgrade kit you are interested in. The Sprite Pro kit is compatible with a few more printers, since it does not have as much reliance on the existing printer hardware. There are two variations of each kit, so it’s important to check that you order the one that will work with your printer. Refer to the table below to see which options your 3D printer will support (and note that there may be other models that also work with these kits, but we can’t confirm compatibility with printers not listed in the table):
Note: All links in the table point to Amazon products.
| Printer model (Note: some models not shown may work, but we could not confirm) | Extruder-only Upgrade | Sprite Pro Upgrade |
|---|---|---|
| Ender 3 / Ender 3 Pro | Ender Kit | Sprite Extruder Pro Kit |
| Ender 3 V2 / Max | Ender Kit | Sprite Extruder Pro Kit |
| Ender 3 Neo / V2 Neo | Neo Kit | Sprite Extruder Pro Kit |
| Ender 3 Max Neo | Not compatible | Sprite Extruder Pro Kit |
| Ender 5 | Ender Kit | Sprite Extruder Pro Kit |
| Ender 5 Pro | Ender Kit | Sprite Extruder Pro Kit |
| Ender 5 Plus | Ender Kit | Sprite Extruder Pro Kit |
| CR-10 / CR-10 Mini | Ender Kit | Sprite Extruder Pro Kit |
| CR-10 S / S4 / S5 | Ender Kit | Sprite Extruder Pro Kit |
| CR-10 Max | Ender Kit | Sprite Extruder Pro Kit |
| CR-10S Pro V2 | Ender Kit | Sprite Extruder Pro Kit |
| CR-10 V2/V3 | Ender Kit | Sprite Extruder Pro Kit |
| CR-10 Smart | N/A | Sprite Extruder Pro* |
| CR-10 Smart Pro | N/A | Already Installed |
| Ender 3 S1 | N/A | Sprite Extruder Pro* |
| Ender 3 S1 Pro | N/A | Already Installed |
*These printers already include the Sprite extruder, but without the all-metal hot end. The upgrade typically isn’t worth it for these printers unless you need to print specialty high-temperature materials.
Sprite Pro Extruder Upgrade Kits
There are two flavors of the full Sprite Pro upgrade kit:
The first kit (Amazon link) only includes the extruder/hot end itself, and is intended to be used on a printer with a Sprite extruder installed already.
The second kit (Amazon link) additionally includes the new bracket and cabling you’ll need for a printer that does not have a Sprite extruder already.
We’ve linked the correct version of the kit for each printer model in the compatibility table above.
Once you have purchased the kit, you can use our Sprite Pro Installation Guide for a detailed walkthrough of how to install and configure it on your printer.
For printers that already have a Sprite extruder, you can purchase a version of the kit that only includes the Sprite Pro extruder/hot end itself.
For printers that do not already have a Sprite extruder, you’ll want the other version of the kit, which includes the cable and bracket to adapt the printer to the Sprite design.
Sprite Extruder-Only Upgrade Kits
The only difference between the two extruder-only kit variations is the included bracket. We wish Creality would have included both brackets in a single kit to simplify things, but since they didn’t, be sure to pick the correct one. You can use the table above to get a link to the correct kit for your printer, but it’s basically as follows:
The Neo version of the kit (Amazon link) is for printers such as the Ender 3 Neo and Ender 3 V2 Neo. It has a thicker bracket to ensure the extruder is aligned with the Neo series hot end.
The other version of the kit (Amazon link) is for most other Creality 3D printers that do not already have a Sprite extruder.
Once you’ve purchased the correct version of the kit, you can use our Sprite Extruder-Only Installation Guide for a detailed walkthrough of how to install and configure it on your printer.
The Ender version includes a thinner bracket and works with most Creality 3D printers with a Bowden extruder.
The Neo version uses a thicker bracket that is designed to work with the hot end on Neo series printers, such as the Ender 3 V2 Neo.


